 I’ve been using a DeLorme InReach Explorer for a couple years. It’s a basic GPS unit but offers text messaging via an Iridium Satelite account as well as a SOS feature. This gives me great peace of mind when I’m out in the wild.
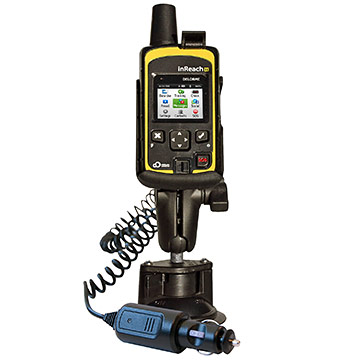
Up until recently, I’ve mounted the device in my vehichle using a Powered inVehicle RAM Mount. This is a great product and convenient way to mount the GPS unit in my vehicle. However, I’ve always had two problems with it, which I recently solved. Continue reading to learn more.
The first problem I had is that the suction cup tended to lose it’s grip on the windshield after long periods of time. This was most annoying when racing down a dirt road and it popped off and fell to the floor. Additionally, if the windshield was dirty at all, then all hope was lost. So despite its claims of a non-slip suction cup mount, I’ve always wanted a more secure mount.
The second problem was that the 12v power cord was really annoying. Although the cord was long enough to reach the 12v power adapter in the center console of my truck, it stretched across my dash and simply got in the way. Therefore, I needed a solution to provide power in closer proximity to the mount.
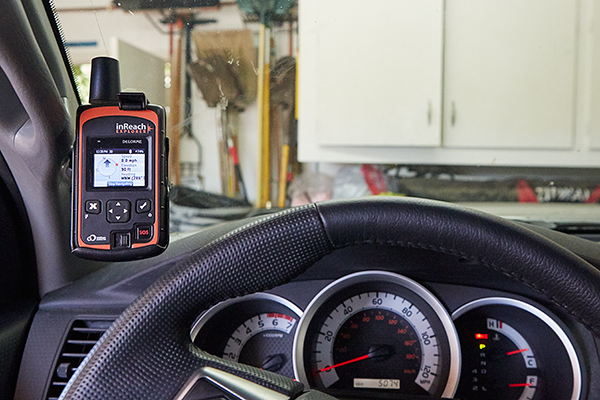
I solved the first problem by permanently mounting my DeLorme InReach Explorer into my 2015 Toyota Tacoma by way of a RAM mount bolted to the A-Pillar. The power problem was solved by installing a 12v-to-5v converter and hard-wiring power directly to the inVehicle RAM Mount.
I’m going to show you how I installed and wired my device, but let me first discuss the parts and specialty tools I used for this project.
PARTS
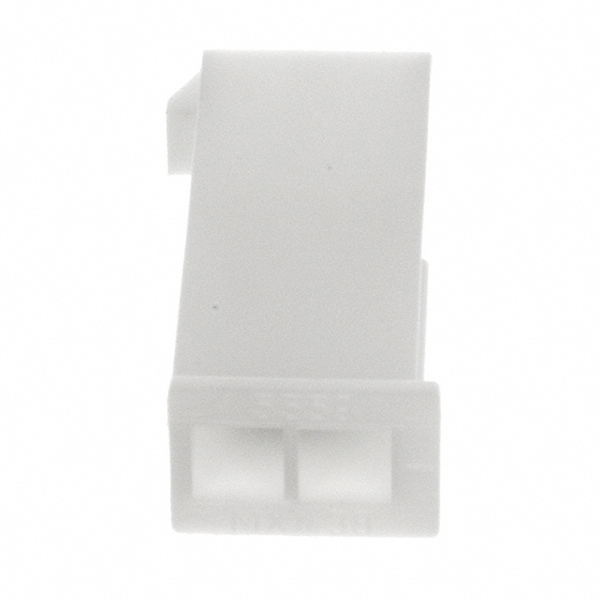
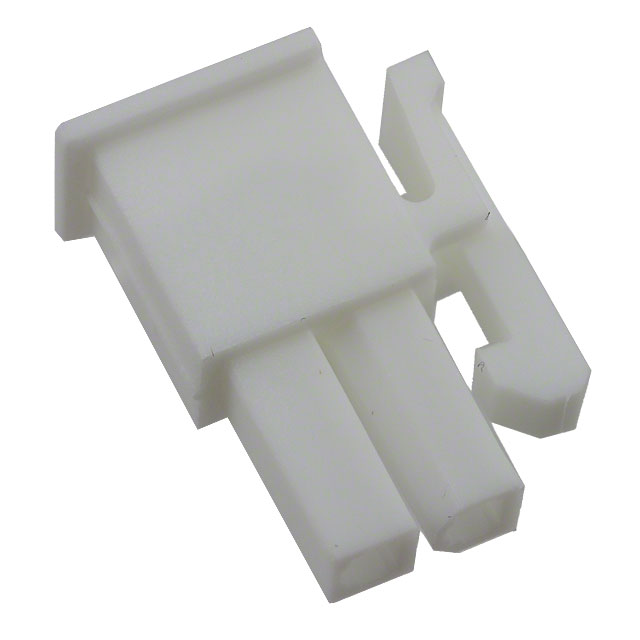
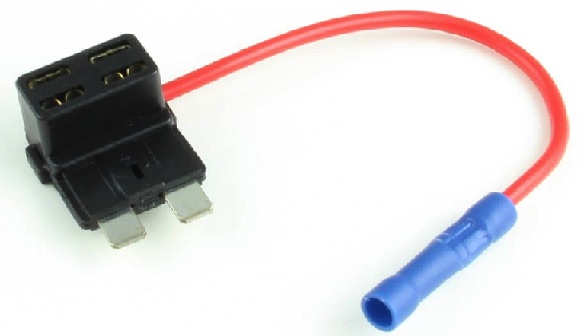
DeLorme InReach Powered inVehicle RAM Mount
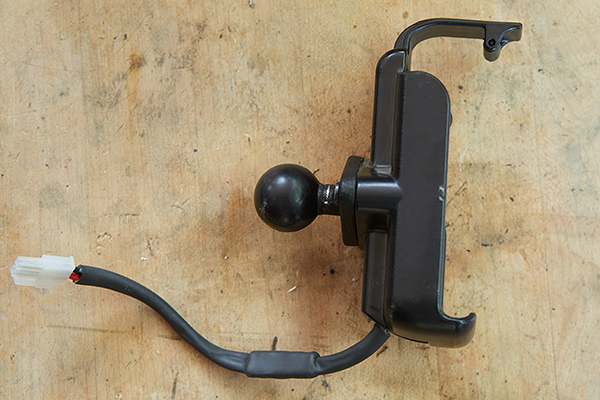
This is the mount that I started with. Even though this product provided everything necessary to mount the GPS unit in a vehicle, all I needed was the cradle to hold the InReach Explorer, the 1″ RAM ball, and the power cord. The suction cup and power plug were no longer needed. This can be purchased at Amazon.
RAM Mount Motorcycle Handlebar Clamp Base
This mounting kit can be found in the motorcycle section at RAM Mount. The model number is RAM-B-367U, and can be purchased at Amazon. It included three M8 screws, but these were too large for my application and not used.
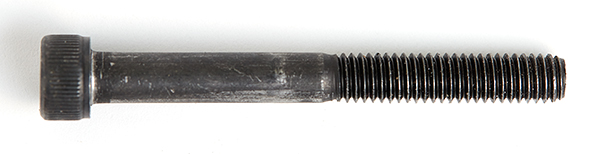
Socket Screw
The RAM Mount Handlebar Base included M8 hardware, but I needed a M6 x 1.0 x 55mm screw to mount it to the A-pillar in my Tacoma. I purchased one at a local hardware store, but it can also be purchased at Amazon or McMaster Carr.
RAM Short Double Socket Arm
Although a double socket arm was included with the inVehicle RAM Mount, I wanted to use a shorter arm. Therefore, the shortest one available was RAP-B-201U-A, which can be purchased at Amazon. 
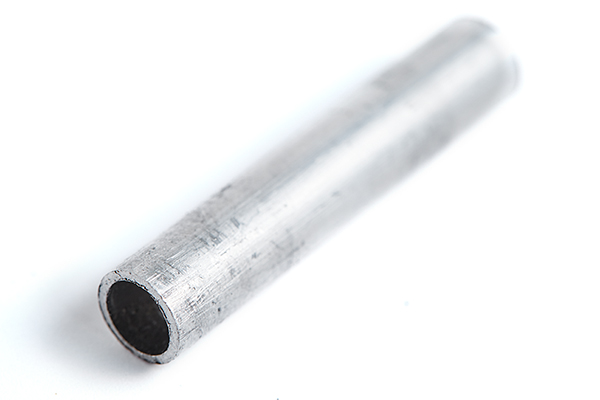
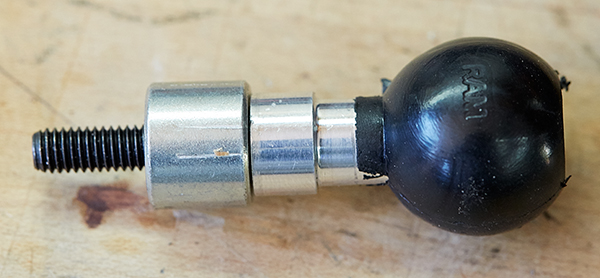
Multipurpose aluminum tubing
Because I used M6 screws instead of M8 screws, there was extra space around the screw as it traveled through the shaft of the RAM Mount Handlebar Base. Although not required, I used aluminum tubing to take up the spacing inside the shaft. The tubing was 5/16″ O.D. and .035 wall thickness. I purchased at a local hardware store, but it can be purchased at McMaster Carr.
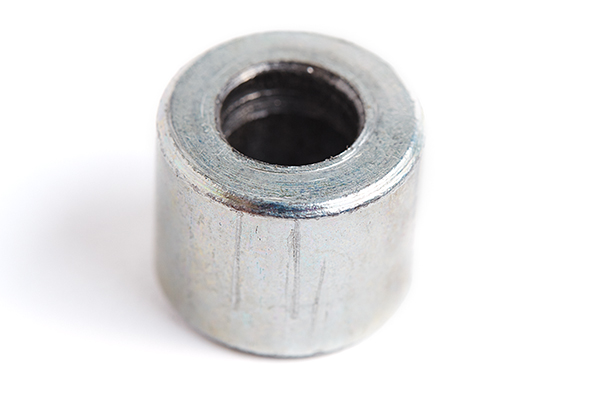
Zinc Spacer
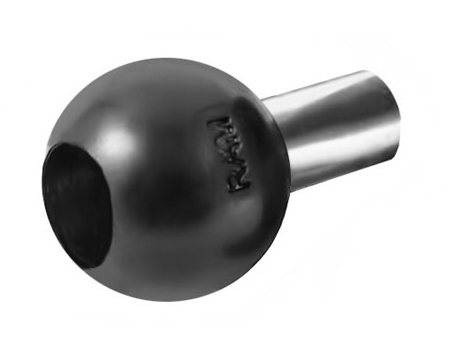
I used a spacer to make the RAM ball stick out further from the A-pillar. Although unnecessary, using a spacer gave me more flexibility when positioning the cradle. I used a 1/2″ zinc spacer with 1/4″ I.D. and 5/8″ O.D., which was purchased at a local hardware store. It can be found at McMaster Carr.
Because I was using aluminum tubing, I wanted it to travel through the spacer as well. Therefore, I ultimately bored the inside diameter of the spacer to 5/16″ to accommodate the tubing. If you can find one with a 5/16″ I.D. then buy that instead and save a step. If you’re not using tubing, then choose a spacer with an appropriate I.D. to coincide with the M6 screw.
Rubber push-in grommet
I’ll be running power directly to the RAM Mount cradle, which will navigate up the A-piller. I hid the wiring behind the trim piece and routed it through a hole that I drilled very close to the RAM ball. Although not required, I felt that a rubber grommet would look better than a roughly drilled hole. Therefore, I purchased a rubber push-in grommet at a local hardware store with the following dimensions. This worked, but a slightly larger thickness dimension “B” would have been a better fit.
A: 3/8″
B: 1/16″
C: 1/4″
D: 9/16″
E: 1/4″

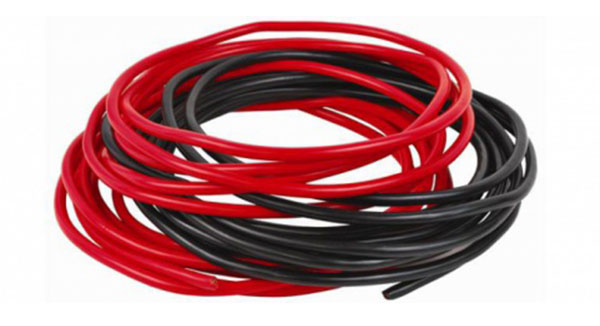
Wire
The power requirements for the InReach Explorer was about 2 amps. Therefore, I could have used a smaller gauge wire, but I typically don’t use anything smaller than 18 AWG for vehicle wiring. It’s just easier to work with.
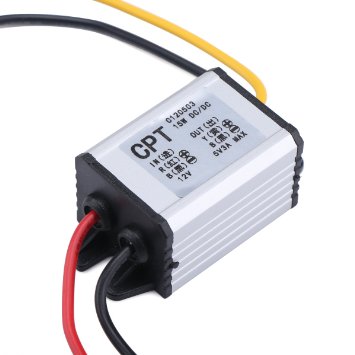
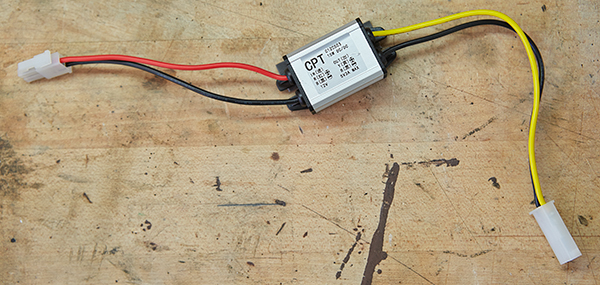
Voltage converter
The 12v power plug that came attached to the inVehicle RAM Mount would normally convert 12v to 5v, which was the required voltage for charging the InReach Explorer. Therefore, when cutting the plug off, I wasn’t able to connect it directly to my vehicles battery. To solve this problem, I used a 12v to 5v converter by DROK, that can be purchased at Amazon.
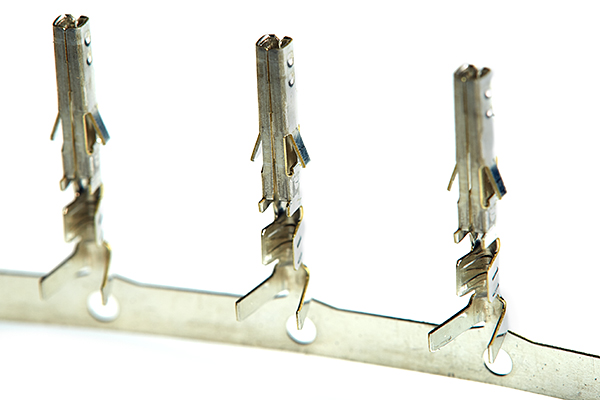
Molex Mini-Fit Jr. connectors, 2-position
I wanted as much flexibility during installation and for any future vehicle repairs. Therefore, I used Molex connectors that can be easily unplugged if needed. A great, inexpensive connector is the Mini-Fit Jr. by Molex. This line of connectors can host up to 24 connections at 9 amps. For this application, I used 2-position connectors.
Male plug connectors (Molex part #39-01-3023) can be purchased at Mouser.
Female receptacle connectors (Molex part #39-01-2020) can be purchased at Mouser.
Molex Mini-Fit Jr. Terminals
Male pin terminals (Molex part # 39-00-0040) can be purchased at Mouser.
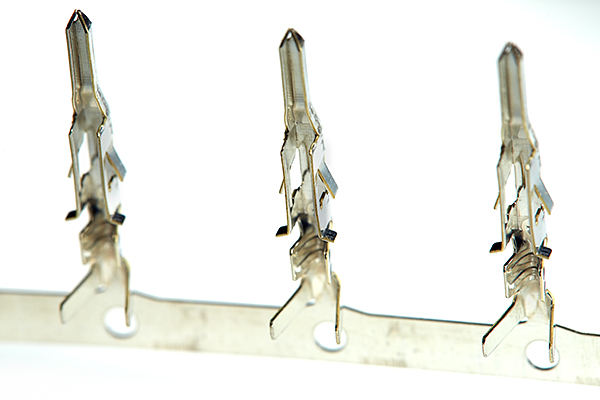
Female socket terminals (Molex part # 39-00-0038) can be purchased at Mouser.
Butt Splice
These are general purpose butt splice connectors used to extend the wiring from the mount. These are 18AWG.
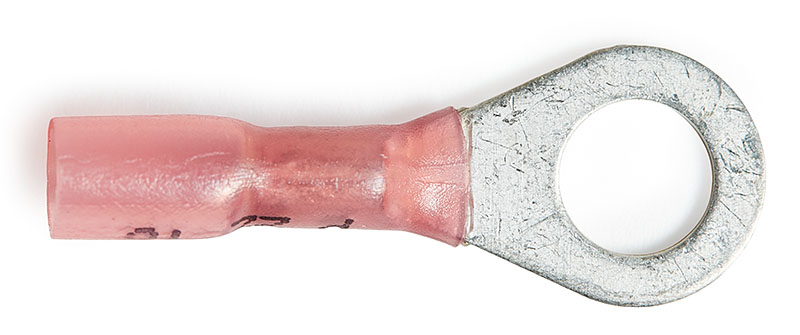
Ring Terminal
I connected ground to the body at a bolt under the dash. I used an 18AWG ring terminal with a 1/4″ hole. (I’m showing a heat-shrink ring terminal here, but this isn’t necessary.)
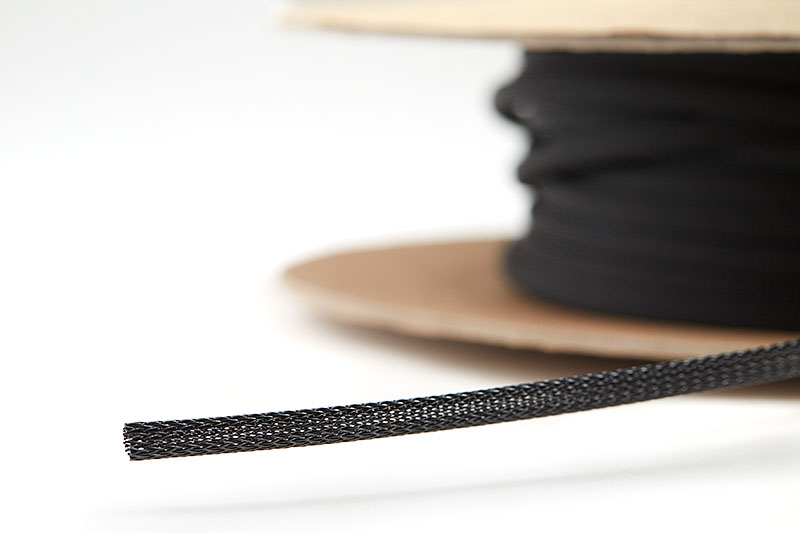
Braided Wire Sleeving
I used 1/4″ braided sleeving to group the wiring together and protect it. Braided sleeving can be purchased at Amazon.
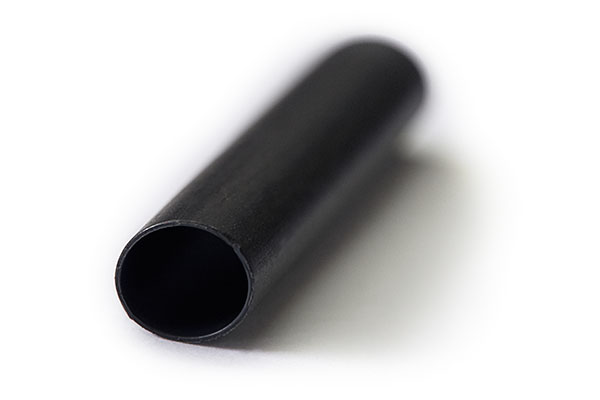
Adhesive-lined heat Shrink Tubing
I used adhesive-lined heat shrink tubing to hold braided sleeving in place and to cover the butt splices. Using adhesive-lined tubing is not required, but it’s what I had on hand and it held the braided sleeving in place a little better. 3/8″ diameter tubing is available at Waytek Wire and 1/2″ tubing is here.
Cable Tie Mounts
To attach the wiring to the A-piller, I used a self adhesive cable tie mount along with a zip tie. These are made by Startech and available at Amazon, but other brands are available at your local home center.

Zip Ties
I used small 4″ zip ties to secure the wiring to the cable tie mounts and in various places under the dash. These are available at Amazon and your local home center.
Double Sided Mounting Tape
I used 3M Super Strength Molding Tape to mount the voltage converter and cable tie mount, which can be purchased at just about any auto parts store. But it’s also available at Amazon.

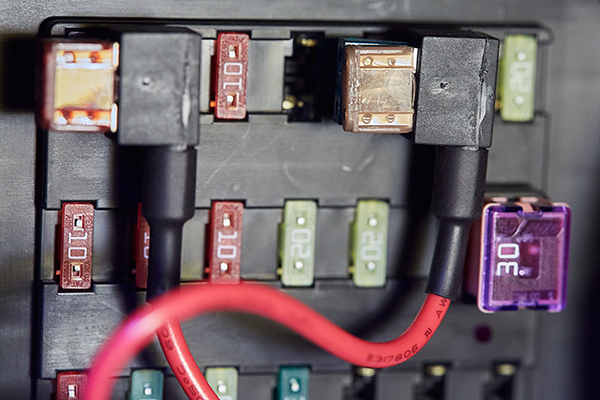
Fuse Tap
I used a fuse tap to provide 12v power to the input of the voltage converter. These can be purchased at Amazon.
TOOLS
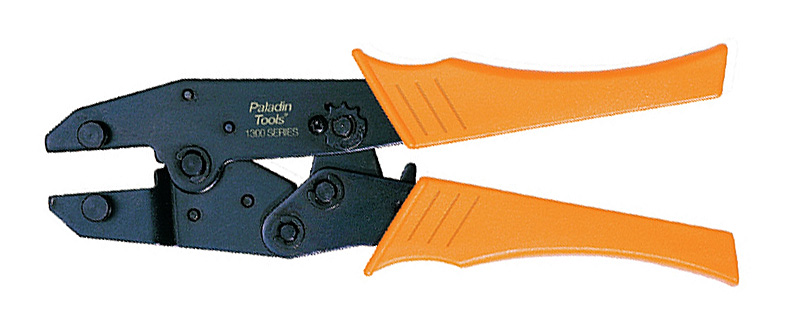
I’ve used a Paladin Tools PA1302 ratchet crimper for many years, but Paladin was purchased by Greenlee Textron several years ago. This crimper utilizes interchangeable dies. The Greenlee crimper frame can be purchased at Amazon. However, if you search, you can find sets that include a specific die along with the frame.
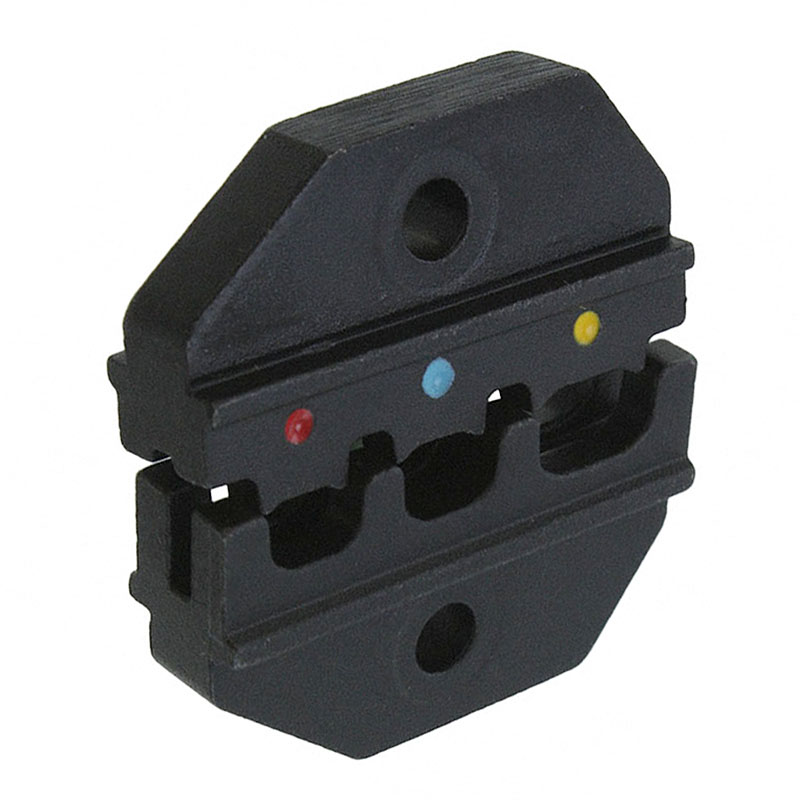
In order to crimp butt splices and ring terminals, I used crimp die, PA2040, which can be purchased at Amazon.
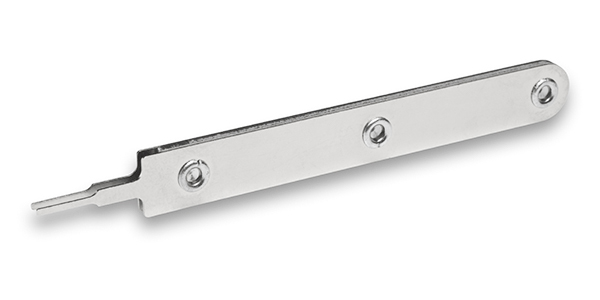
To remove the Molex terminals from the connectors in case of a mistake, a Molex Mini-Fit Jr. terminal extraction tool can be purchased at Mouser. This is highly recommended, because you definitely will find yourself wanting to remove the pins.
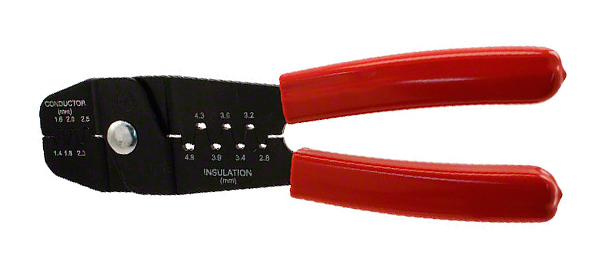
The Molex Mini-Fit Jr. terminals are extremely small. Therefore, a special crimper is needed. This is the inexpensive version and can be purchased at Amazon or Mouser.
INSTALLATION
Now that all the parts and tools are in order, I was ready to start.
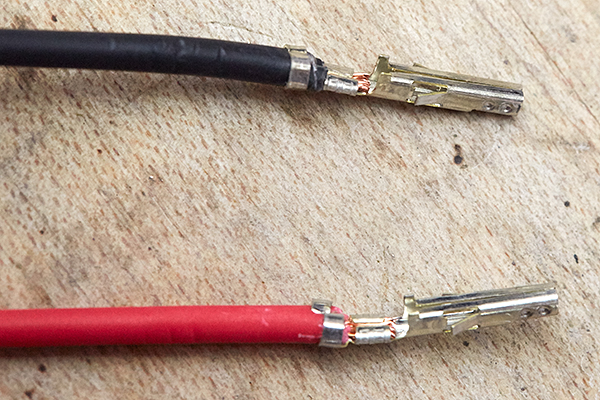
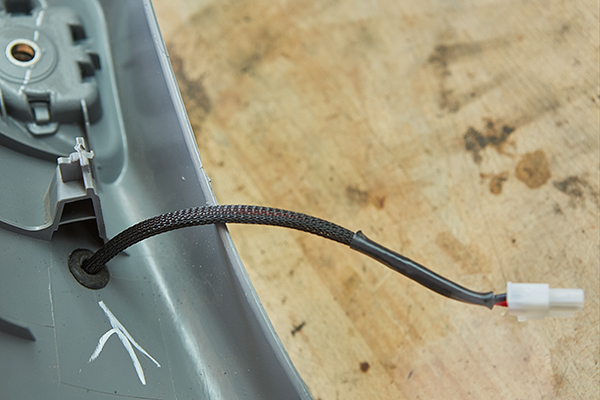
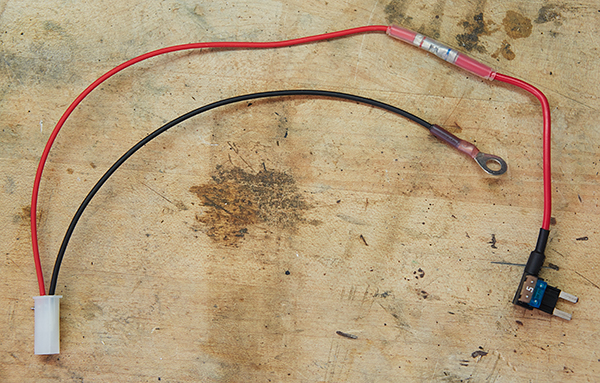
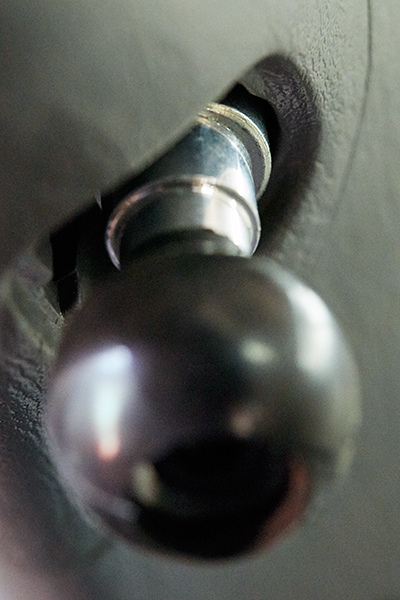
I began by cutting off the 12v adapter plug from the Powered inVehicle RAM Mount. I stripped back insulation to expose the individual wires. Although there are four pins on the cradle that connect to the back of the InReach Explorer, only the two outside pins are in use.
Next, I cut a red and black 18AWG wire a few inches long. All wires were stripped and crimped to the RAM mount wiring using 18AWG butt splices. In hindsight, I probably should have just left the wiring longer from the cradle and omit the but splices altogether. Then I could have simply crimped on the Molex terminals and be done with it. Oh well!

On the opposing end, I stripped and crimped on Molex female Mini-Fit Jr. terminals.
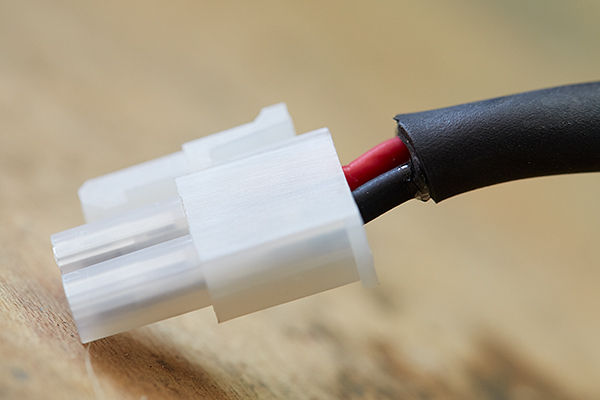
I cut a piece of 1/2″ heat shrink tubing, slid over the two wires and butt splices, and used a heat gun to shrink in place.

I inserted the terminals into the female receptacle connector.
As you can see, I kept these wires very short. This was intentional so that I could remove the entire mount in the future if need be.
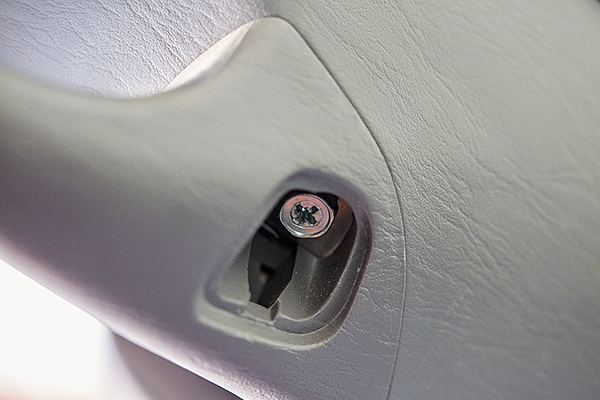
Next, I removed the A-pillar cover. The mounting bolt covers can be removed with your fingernail or a small screwdriver.

After removing the two mounting bolts, the A-pillar trim cover was removed by simply pulling it away from the pillar.
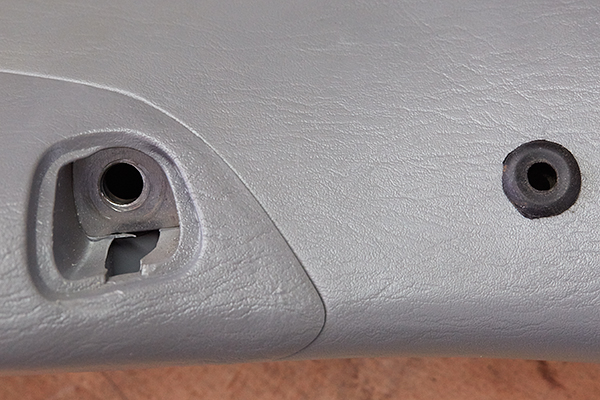
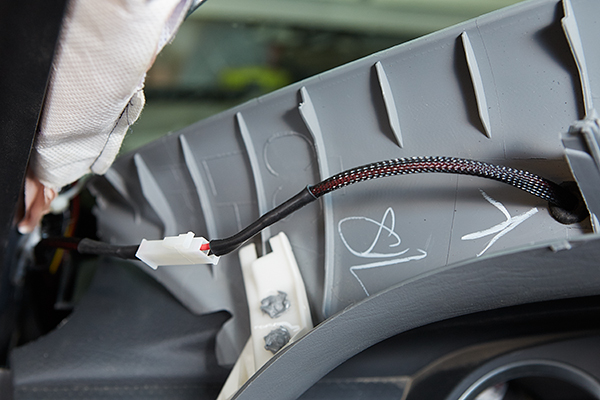
Next, I drilled a 3/8″ hole into my A-Piller cover just below the lower handle bolt and pushed in the rubber grommet.
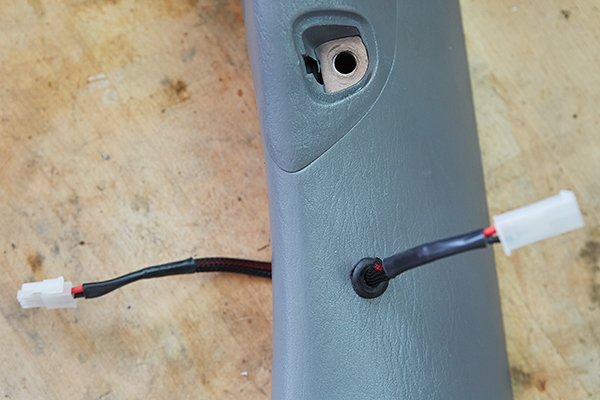
I needed to make another length of wire that traveled through the A-pillar trim. This was about 12″ long with Molex connectors on either side. This way, the entire trim piece can be removed. The process involved installing a connector on one end and then covering the wires with braided sleeving and heat shrink. I inserted the wire harness through the rubber grommet before installing the terminals and connector on the opposing end.
From the backside, you can see where the hole was made in approximation to the mounting hole.
After this, I made the power supply wiring harness. I cut several feet of wire and installed Molex terminals and connectors to both ends. As before, I used braided sleeving and heat shrink to protect the wiring and group them together.
I routed the wiring harness up through the dash and secured it in place at the bottom of the A-pillar with a cable tie mount and zip-tie. I kept the zip-tie loose, which was intentional so that the wiring could be maneuvered as required. This made installation and removal of the A-pillar trim easier. (By the way, an electricians fish-tape or coat hanger aids in navigating the wire up behind the dash and to the A-pillar.)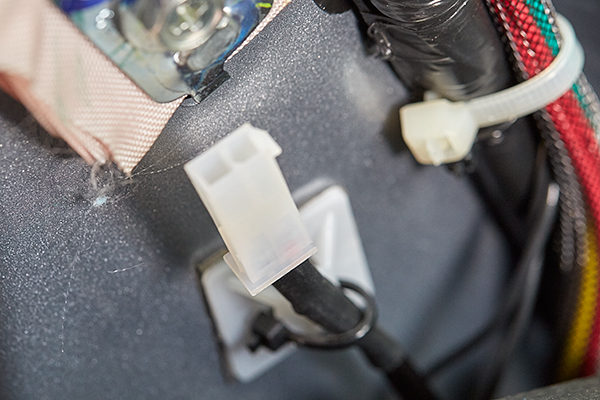
I installed Molex connectors to both the input and ouput sides of the 12v-to-5v converter.
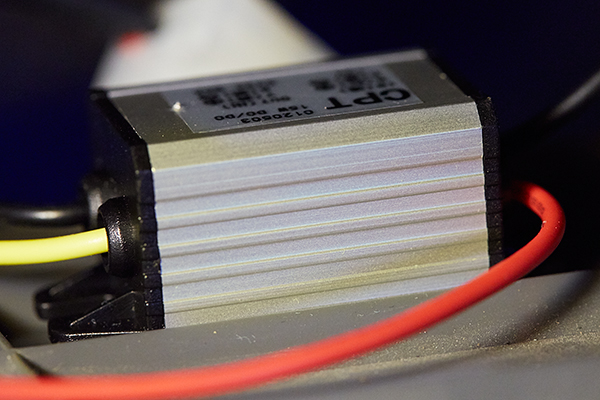
The converter was mounted with 3m double-sided tape to the backside of the under-dash trim panel. The output of the converter connects to the wiring harness routed up behind the dash and to the A-pillar.
To connect the input side of the converter to power and ground, I made another wiring harness. A Molex connector was installed on one end with both wires. For the opposing ends, the red wire connected to a fuse-tap for power, and the black wire terminated with a ring terminal for ground.
The 12v-to-5v converter was attached to the backside of the trim piece below the steering column. Ground was terminated at a mounting bolt. This wasn’t an ideal spot for grounding, but will suffice for the time being. I ultimately plan to install an additional fuse block within the cab.

For the 12v source, I used a fuse tap.
To re-install the A-pillar trim, I needed to do a little fabrication. I first bored the hole in the zinc spacer from 1/4″ to 5/16″. Then I cut a length of aluminum tubing so that it spanned the length of the shaft in the RAM ball mount and the spacer.

When put together, it looked like this.
The A-pillar trim was re-installed by first connecting the wiring together with the Molex connectors
After securing the top bolt, I used the RAM ball mount with spacer for the bottom mounting hole.
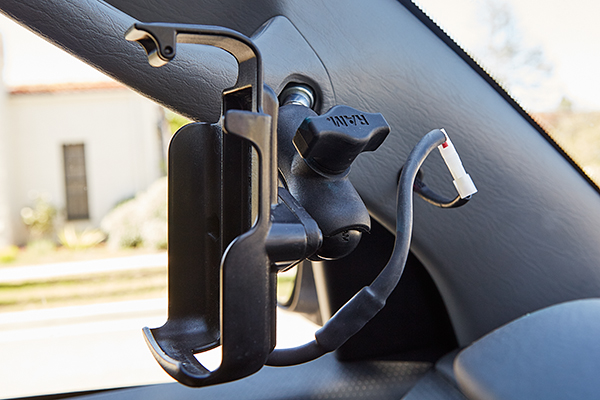
The cradle was mounted using a short double socket arm, RAP-B-201U-A, and positioned in place.
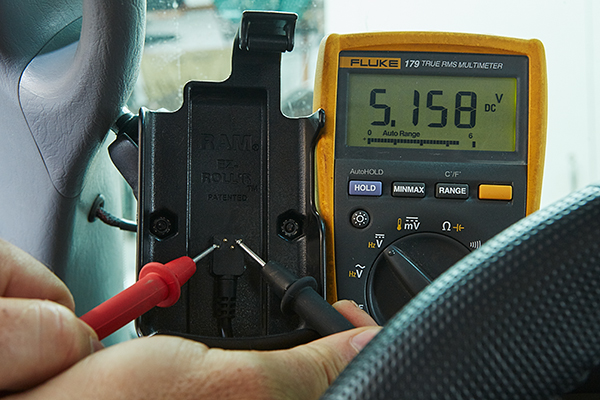
Using a volt meter, I tested that I correctly had 5 volts on the two outside pins.
With the DeLorme InReach Explorer in place, the GPS unit received power whenever the ignition was on.
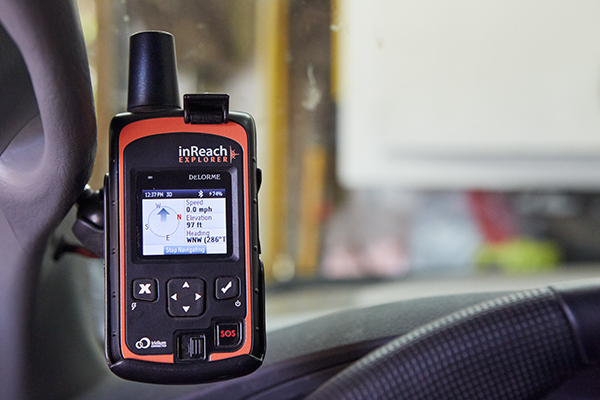
Success! I now had a secure mount for my DeLorme InReach Explorer with a dedicated power supply. I was very happy with the results.