Google Earth is a wonderful application that allows you to explore the world around you from the comfort of your home. You can pre-plan an overland adventure to create tracks and waypoints that you can then follow once out in the wild. However, it’s not a GPS navigation system, so you need another device or application. That’s where MotionX GPS HD for the iPad comes in. But how do you get these tracks and waypoints from Google Earth into MotionX? Well, today I’m going to show you how to export a track from Google Earth and bring it into MotionX GPS HD.
Let me start by saying that I’m not going to teach you how to use Google Earth. There are many other tutorials out there, especially at the Google Earth Learn page. Instead, this tutorial will outline the following steps.
- Within Google Earth, group your track and waypoints into a single folder
- Save your “Place” as a .kml file
- Convert .kml file to .gpx file using an application called GPSBabel
- Email the .gpx file to yourself
- Access your email on your iPad
- Open .gpx file with MotionX GPS HD and import
Plan
Obviously, the first thing you need to do is plan a trip. This begins by creating a track and some waypoints in Google Earth.
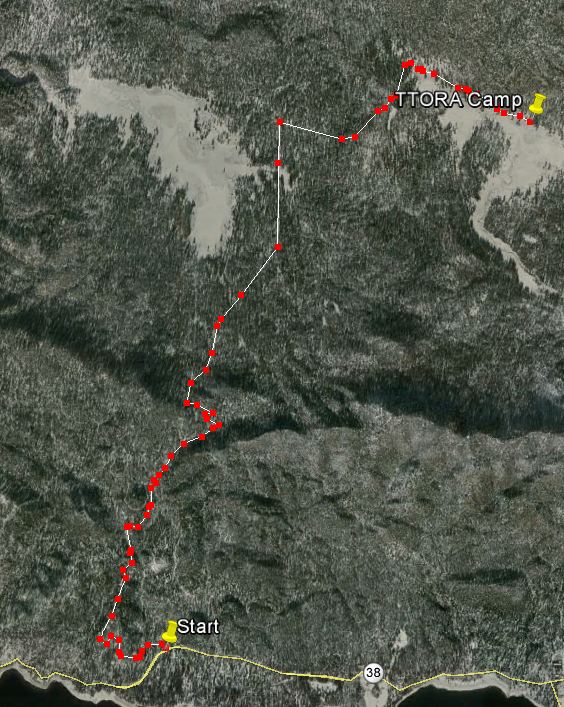
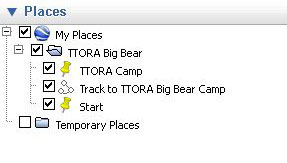
However, during this process, you need to plan for your planning. What I mean is that you need to setup Google Earth so that you can export your track and waypoints as a single file. This is very easy. All you have to do is group your track and waypoints together in a single folder. So start by creating a folder in Google Earth and then put the track and waypoints you create inside it. Google Earth calls this a “Place”. In this example, I have two waypoints and one track.
Export
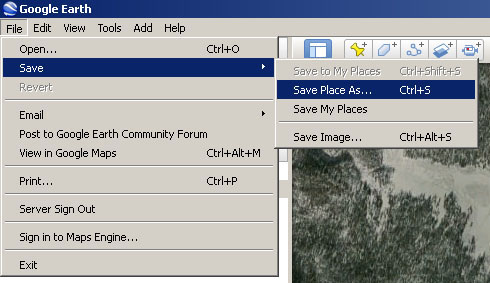
Once you’ve completed your pre-planning, simply select your “Place” that you want to export as follows.
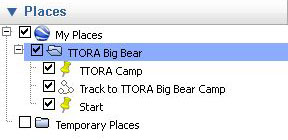
Next, select “Save Place As…” from the File/Save menu.
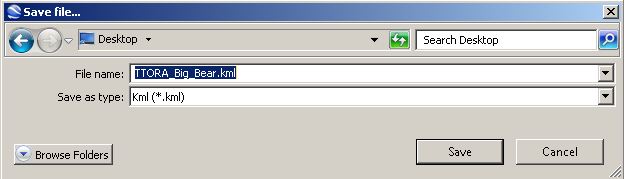
A “Save file…” dialogue window will appear. Name the file and choose your location as you wish. Then change the “Save as type” to “Kml(*.kml)” and click “Save”.
Convert
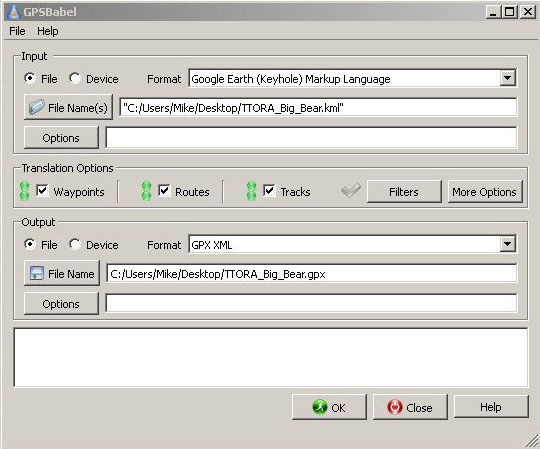
Next, we’ll use an application called GPSBabel to convert from a .kml file to a .gpx file. The application is very simple, although is has many options that you can change. I simply used the default options for this tutorial.
After opening GPSBabel, you need to change the Input format to “Google Earth (Keyhole) Markup Language”. Then select the .kml file that you exported from Google Earth.
In the Output section, change the format to “GPX XML”. Name and select the location where you want to save the file. Then click “OK”.
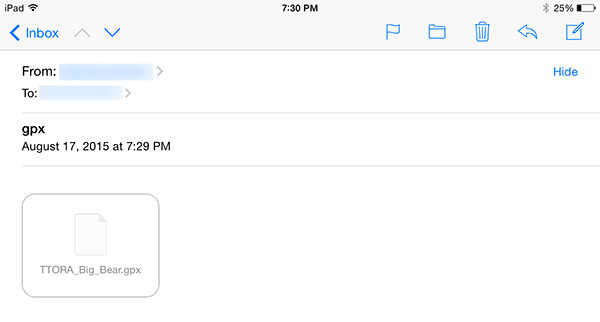
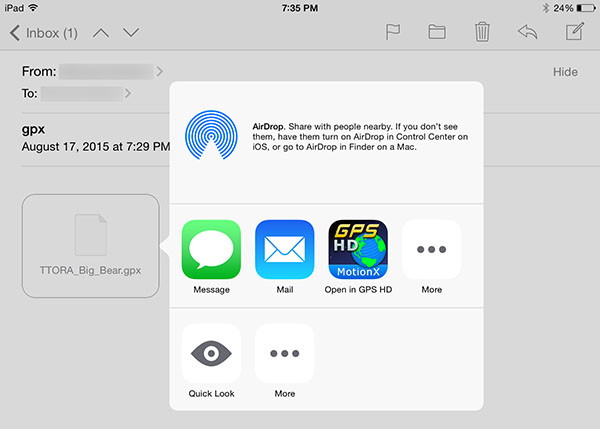
Now that we’ve converted the .kml file to a .gpx, you need to email it to yourself. Afterwards, access your email on your iPad. Open the email you just sent to yourself and you’ll see the .gpx file as an attachment.
Import
To import the file into MotionX GPS HD, simply hold your finger on the file until a pop-up window appears. Select “Open in GPS HD”.
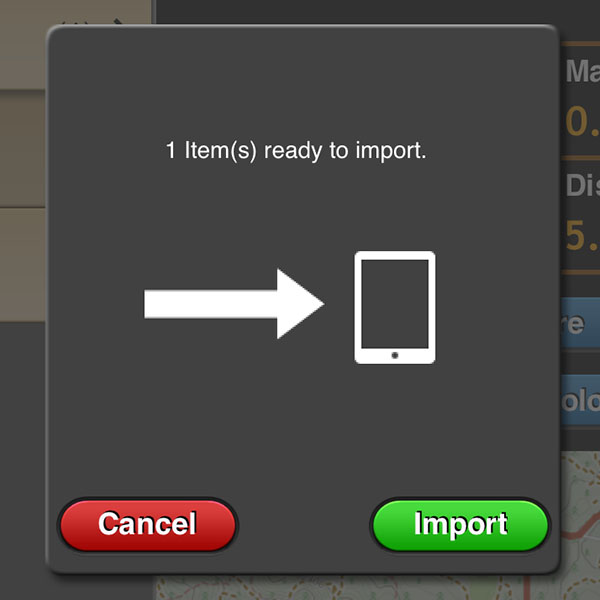
MotionX GPS HD will open and prompt you to import the file. Select “Import” and you’re done.
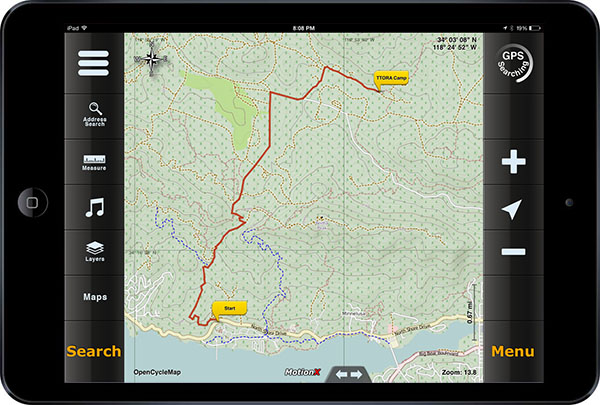
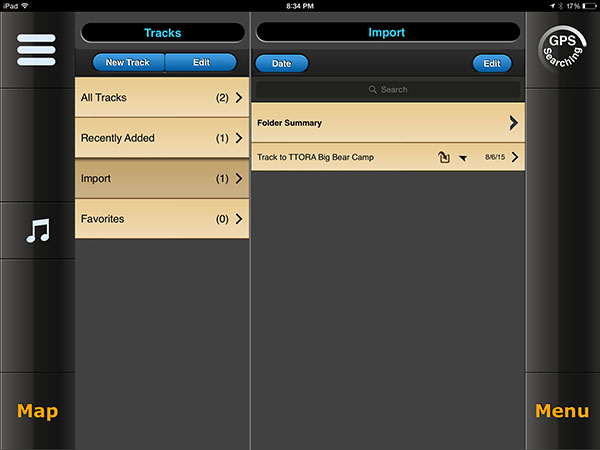
From here, you can navigate within MotionX GPS HD to Menu/Tracks and you’ll see the imported track.
By selecting your imported track, you’ll be brought to the following page where you can click “Start Follow” to begin following the track.
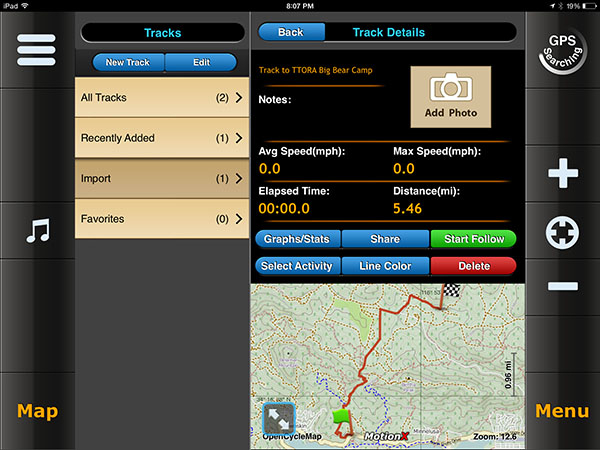
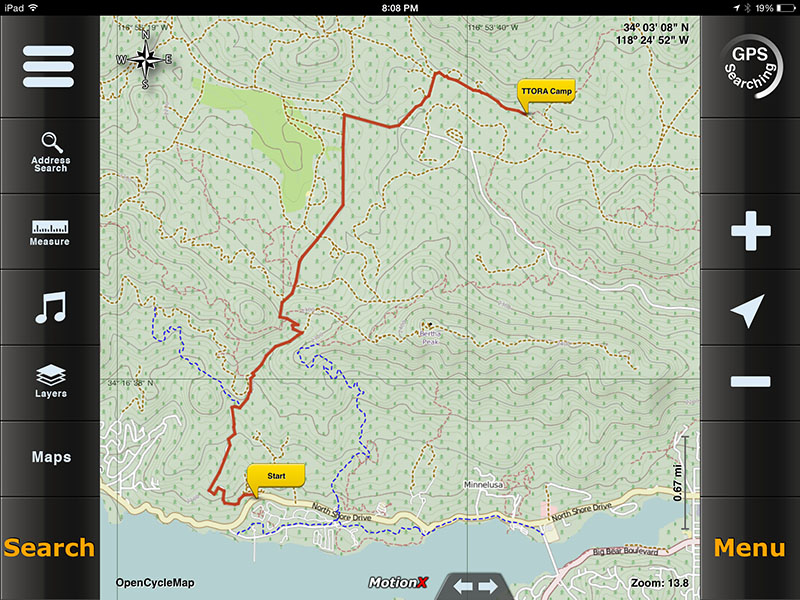
In the next image, I’ve setup the map to display the track and waypoints.
And that’s all there is to it. With this process, you get to utilize the power of both applications. Google Earth allows you to plan your trip, and MotionX GPS HD allows you to explore without getting lost.